First you need the installer, download it from here.
Requirements:
Visual Studio 2010 or VS 2008 SP1
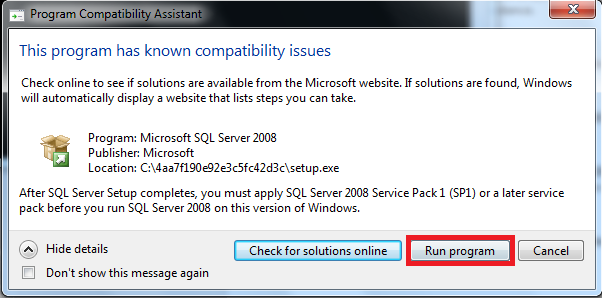
Note: After Clicking on that a window may appear as bellow. Just click on the button Run Program of that.
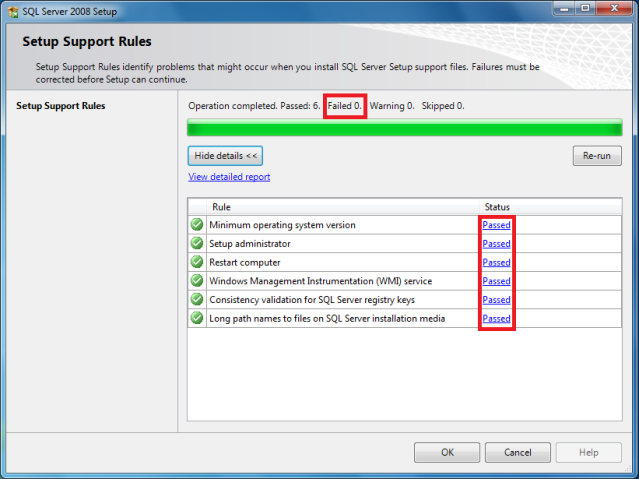
Step 3: Now setup will take a moment to complete some operation. To continue there can not be any operation with status failed. If any operation fails then it will not be possible to continue installation. Click OK
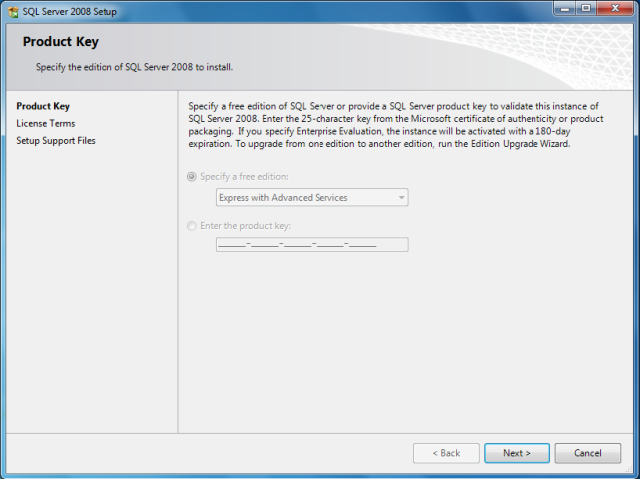
Step 4: This is express edition so I do not need to enter any product key. Just Click on Next
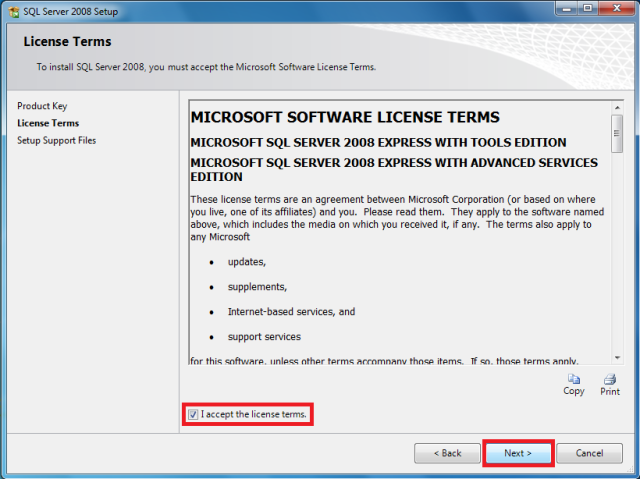
Step 5: Check Accept the terms and click NEXT
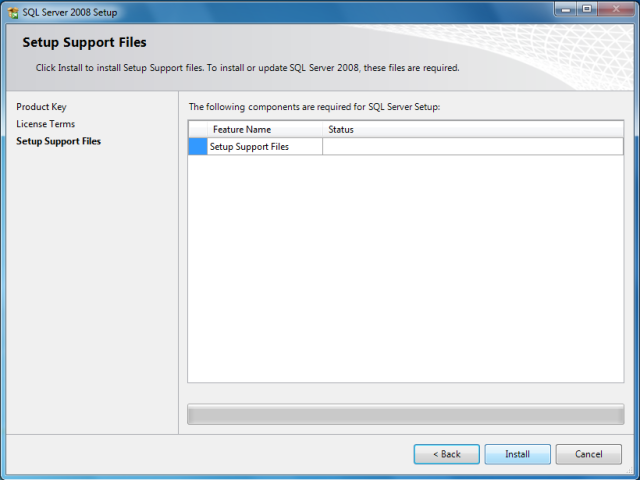
Step 6: Now Click Install button. Some setup support files will be installed.
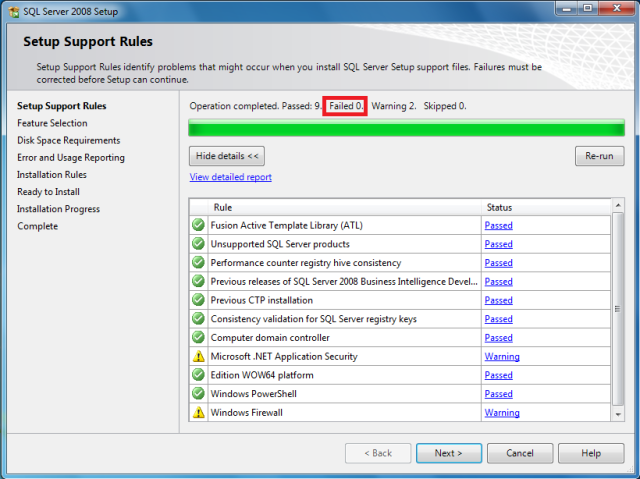
Step 7: Now again It needs some operation to be completed. Every operation must be passed or warning or skipped. If any operation fails then it is not possible to continue. Click Next.
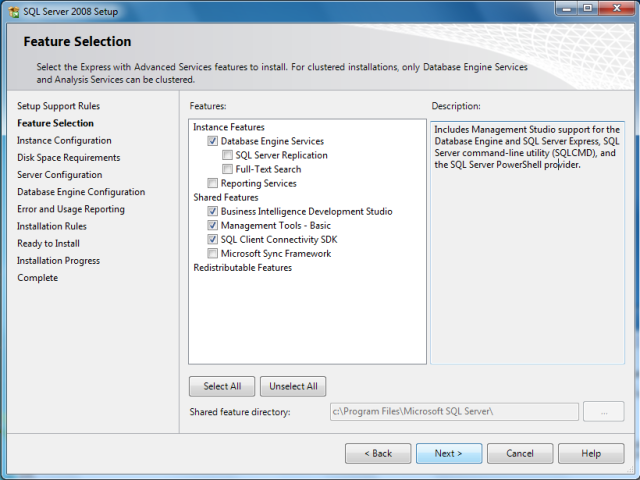
Step 8: Now select the features which do you need. Here I am selecting Database Engine Services, Busines Intelligence Development Studio, Management Tools basic & SQLl Client Connectivity SDK. Click Next.
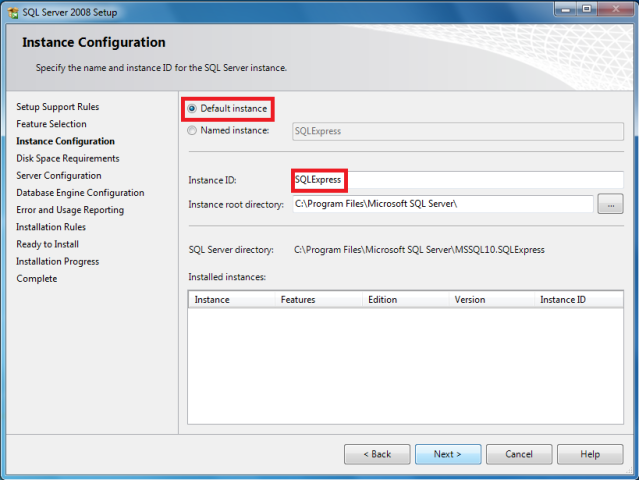
Step 9: Here we need the name and instance ID. I am selecting Default Instance but keep the name “SQLExpress” in your mind for future use. Click Next.
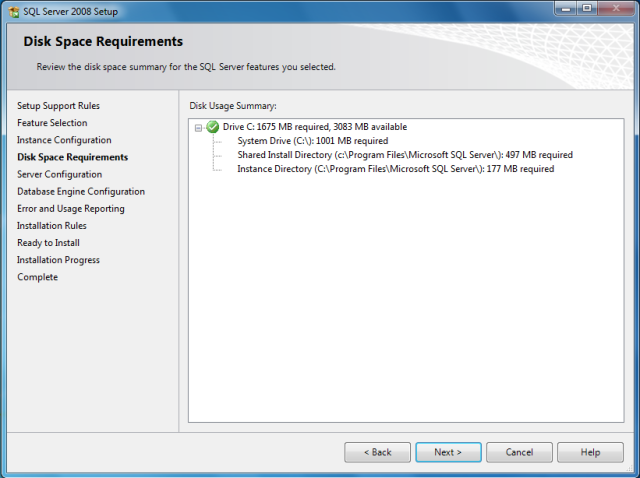
Step 10: Now a window will appear and it will show the space required and available. Click Next.
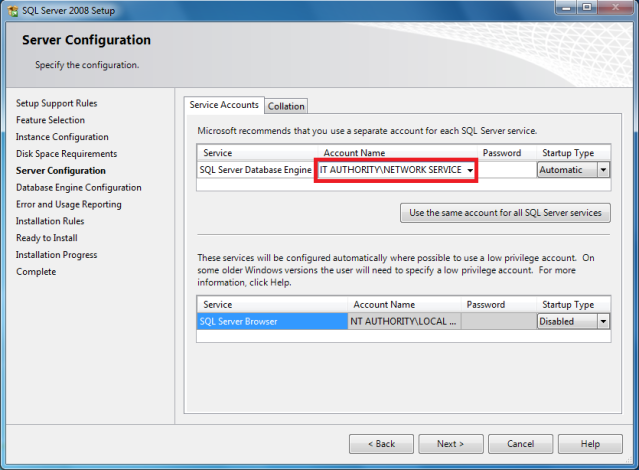
Step 11: Here select the account name from the dropdown list for SQL Server Database Engine-
NT AUTHORITY\NETWORK SERVICE and Click Next.
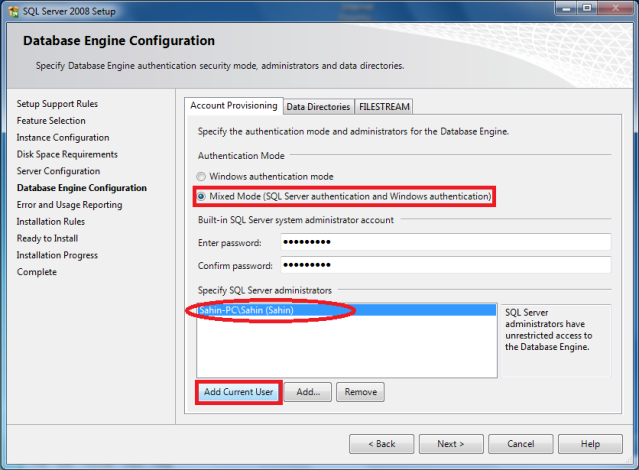
Step 12: Now select which mode do you want to use. Here I am selecting the Mixed mode.
For mixed mode I have to provide the password for the root account (username “sa” default) and adding my current user by which i will also be able to access database engine without default administrator account (username : sa ).
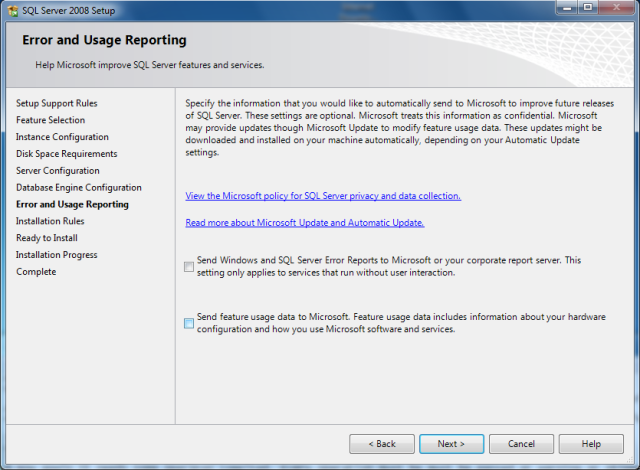
Step 13: Click Next
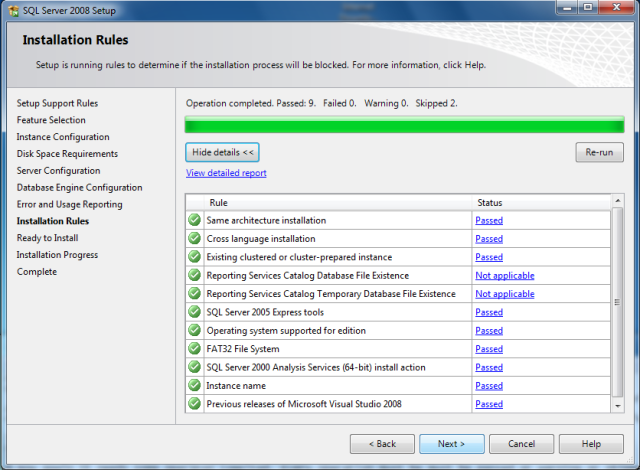
Step 14: Now again every operation must be passed or skipped. If there is any operation with status failed then installation will not be possible. Click Next
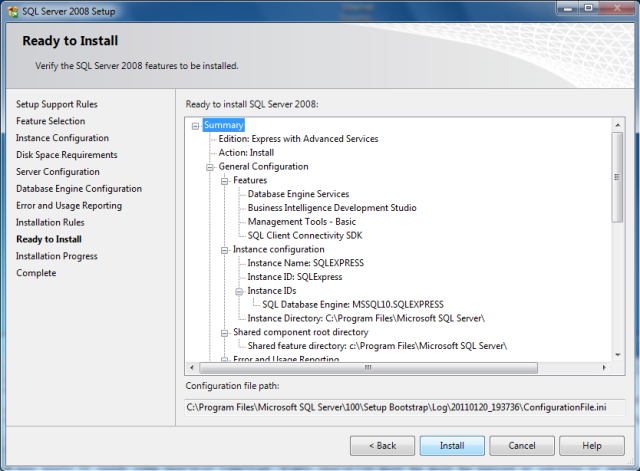
Step 15: Now finally it is going to start the installation. Click Install
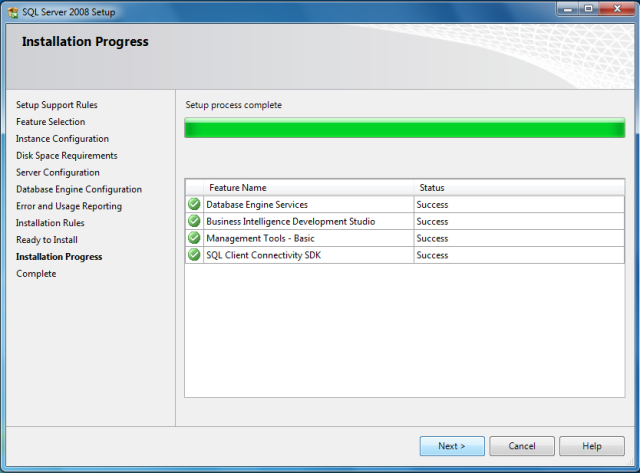
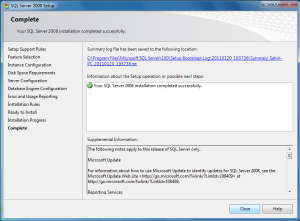
Step 16: Now wait till installation is complete. Setup is complete. Click Next
Step 17: Now Close this window
At last Exit this window
Requirements:
Visual Studio 2010 or VS 2008 SP1
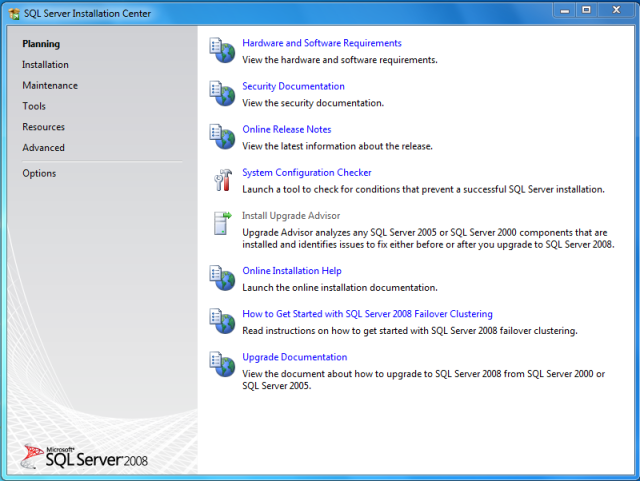
Step 1: Double click on the installer. It will take some time to extract. After that an window will open as follow.
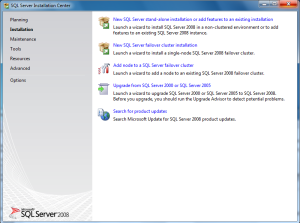
Step 2: From this window click on the Installation menu (See Left). Now there will be appear some option under Installation. From right, click on the option New SQL Server stand-alone installation or add features to an existing installation.Note: After Clicking on that a window may appear as bellow. Just click on the button Run Program of that.
Step 3: Now setup will take a moment to complete some operation. To continue there can not be any operation with status failed. If any operation fails then it will not be possible to continue installation. Click OK
Step 4: This is express edition so I do not need to enter any product key. Just Click on Next
Step 5: Check Accept the terms and click NEXT
Step 6: Now Click Install button. Some setup support files will be installed.
Step 7: Now again It needs some operation to be completed. Every operation must be passed or warning or skipped. If any operation fails then it is not possible to continue. Click Next.
Step 8: Now select the features which do you need. Here I am selecting Database Engine Services, Busines Intelligence Development Studio, Management Tools basic & SQLl Client Connectivity SDK. Click Next.
Step 9: Here we need the name and instance ID. I am selecting Default Instance but keep the name “SQLExpress” in your mind for future use. Click Next.
Step 10: Now a window will appear and it will show the space required and available. Click Next.
Step 11: Here select the account name from the dropdown list for SQL Server Database Engine-
NT AUTHORITY\NETWORK SERVICE and Click Next.
Step 12: Now select which mode do you want to use. Here I am selecting the Mixed mode.
For mixed mode I have to provide the password for the root account (username “sa” default) and adding my current user by which i will also be able to access database engine without default administrator account (username : sa ).
Step 13: Click Next
Step 14: Now again every operation must be passed or skipped. If there is any operation with status failed then installation will not be possible. Click Next
Step 15: Now finally it is going to start the installation. Click Install
Step 16: Now wait till installation is complete. Setup is complete. Click Next
Step 17: Now Close this window
At last Exit this window
No comments:
Post a Comment